
Dreaming of rich, velvety espresso shots and delicious lattes without leaving your kitchen? Making great espresso at home is a rewarding journey, combining a bit of science with an art form. While it might seem intimidating, with the right tools and a little practice, you can pull cafe-quality shots that will impress even the most discerning coffee lover.
This comprehensive guide will walk you through the essential tools and the step-by-step process to consistently brew perfect espresso from the comfort of your home.
The Foundation: Understanding Espresso
Before we dive into the tools, let’s briefly understand what makes espresso unique:
- Concentrated: Espresso is a highly concentrated coffee brew, typically served in small shots.
- Pressure-Brewed: Unlike drip coffee, espresso is made by forcing hot water through finely-ground coffee at high pressure.
- Crema: A hallmark of well-made espresso, crema is the reddish-brown foam that forms on top, indicating proper extraction and rich flavor.
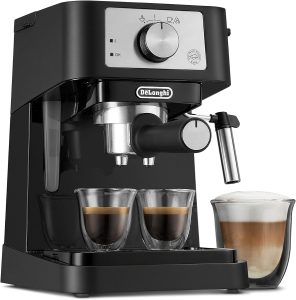
1. Espresso Machine: Your Brewing Powerhouse
This is the most significant investment, but it’s the heart of your home espresso setup. There’s a wide range, from entry-level semi-automatic machines to advanced dual-boiler models. For beginners, a good semi-automatic espresso machine offers a balance of control and ease of use.
- Why it’s essential: Generates the precise pressure and temperature needed for true espresso extraction.
- Look for: A machine with a robust pump (typically 9-15 bar), a good portafilter, and a steam wand for milk frothing. Brands like Breville, De’Longhi, or Gaggia offer excellent beginner-friendly options.
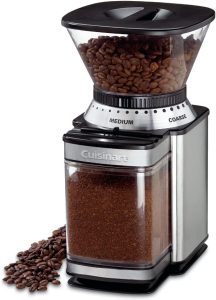
2. Burr Grinder: The Most Crucial Investment (Yes, More Than the Machine!)
You cannot make good espresso without a high-quality burr grinder. Pre-ground coffee loses its freshness rapidly, and espresso requires an extremely fine, consistent grind. A burr grinder (conical or flat burr) allows you to dial in the exact grind size needed for optimal extraction.
- Why it’s essential: Ensures fresh, consistently sized grounds, critical for proper water flow and flavor extraction.
- Look for: A grinder specifically designed for espresso (with micro-adjustments), durable burrs (steel or ceramic), and minimal retention. Don’t compromise here
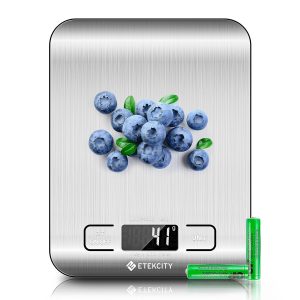
3. Digital Coffee Scale with Timer: Precision in Every Shot
Baking is a science, and so is espresso! A digital coffee scale with a built-in timer allows you to precisely measure your coffee grounds (in grams) and the espresso yield (in grams or ounces). This consistency is vital for replicating excellent shots.
- Why it’s essential: Ensures repeatable results by accurately measuring coffee dose and espresso yield, preventing under or over-extraction.
- Look for: Gram measurement, a timer function, compact size to fit under your portafilter, and water resistance.
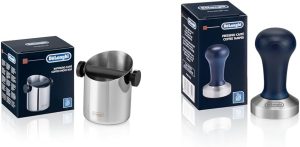
4. Tamper: Create a Level “Puck”
After grinding, you need to compress the coffee grounds evenly in the portafilter to form a “puck.” A good tamper ensures uniform pressure across the coffee bed, preventing channeling (where water finds easy paths through unevenly distributed grounds).
- Why it’s essential: Essential for creating an even and dense coffee puck, promoting uniform water flow and optimal extraction.
- Look for: A tamper that perfectly matches your portafilter basket size (e.g., 58mm, 54mm), comfortable weight, and a flat base. Many machines come with a flimsy plastic tamper – upgrade it!
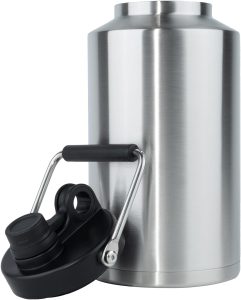
5. Knock Box: Tidy and Convenient
Once your shot is pulled, you’ll have a spent coffee “puck.” A knock box provides a designated, sturdy place to quickly and easily knock out the used grounds from your portafilter, keeping your countertop clean.
- Why it’s essential: For hygienic and convenient disposal of used coffee grounds, protecting your portafilter from damage.
- Look for: Durable construction, a rubber bar to absorb impact, and easy to clean.

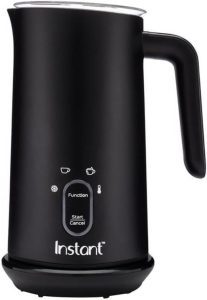
6. Milk Pitcher (for Milk-Based Drinks): Achieve Silky Microfoam
If you love lattes, cappuccinos, or flat whites, a stainless steel milk pitcher is essential for steaming milk. The right shape and size are crucial for creating velvety microfoam.
- Why it’s essential: Designed for steaming milk to the perfect temperature and texture for latte art and delicious milk-based drinks.
- Look for: Stainless steel (good for temperature control), a comfortable handle, and a spout designed for pouring latte art.
7. Thermometer (for Milk): Don’t Scald Your Milk!
Overheated milk tastes burnt and loses its sweetness. A small milk thermometer (or a pitcher with an integrated one) helps you reach the ideal milk temperature (around 140-150°F or 60-65°C) for perfect frothing.
- Why it’s essential: Ensures milk is heated to the optimal temperature for sweetness and texture, avoiding scorching.
- Look for: Quick readings, clip for attaching to the pitcher, and clearly marked temperature zones.
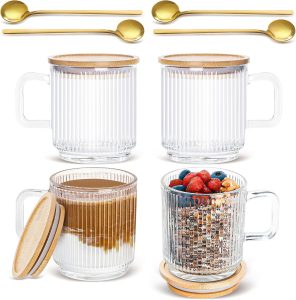
8. Espresso Cups (Demitasse): The Perfect Vessel
Serving your espresso in a pre-warmed demitasse cup (a small, thick-walled cup) is not just aesthetic; it helps retain heat and showcases the beautiful crema.
- Why it’s essential: Designed to maintain the espresso’s temperature and present the shot beautifully.
- Look for: Ceramic or glass, thick walls, and a size appropriate for single or double shots.
The Basic Steps to Your Perfect Shot
- Prep Your Machine: Turn on your espresso machine to allow it to heat up fully (this can take 15-30 minutes). Flush the group head with hot water to warm it up.
- Grind Your Beans: Weigh your fresh, whole espresso beans (typically 18-20 grams for a double shot). Grind them to a fine, consistent powder using your burr grinder. The grind size is crucial – it should feel like finely ground sugar.
- Dose and Distribute: Place the ground coffee into your portafilter basket. Gently tap the portafilter on your counter to settle the grounds. Use a distribution tool (if you have one) or your finger to evenly distribute the coffee.
- Tamp: Place the portafilter on a tamping mat. Using your tamper, apply firm, even pressure straight down to create a level, compact puck. Aim for consistent pressure each time.
- Insert and Brew: Lock the portafilter into the group head immediately. Place your pre-warmed espresso cup(s) on your digital scale.
- Pull the Shot: Start the brew cycle and the timer on your scale simultaneously. Observe the flow – it should start as a dark stream, then lighten to a tiger-stripe pattern. Aim for a yield of around 36-40 grams (double your dry coffee weight) in 25-30 seconds.
- Adjust and Repeat: If your shot runs too fast (under-extracted, sour), grind finer. If it runs too slow (over-extracted, bitter), grind coarser. This is called “dialing in.”
- Steam Milk (Optional): If making a milk drink, steam your milk using the steam wand, aiming for silky, wet paint-like microfoam at 140-150°F.
- Enjoy! Serve your perfect shot immediately, or pour your perfectly frothed milk for a delightful latte or cappuccino.
Making perfect espresso at home is a journey of learning and refinement. Don’t be discouraged by initial challenges. With these essential tools and a commitment to understanding the process, you’ll soon be enjoying barista-quality coffee drinks every day!